'마녀:귀찮아!' DevLog 02
_
이번 일지에서는 에셋들을 관리하기 위한 툴 기반을 만들어본다.
UI Toolkit, 기본적인 레이아웃
전에 툴을 만들어보려고 UI ToolKit을 잠깐 공부해본 적이 있다.
이어서 UI ToolKit으로 만들어본다.
기본적인 레이아웃은 위 영상을 참고했다.
영상 설명란에 적힌 링크에서 자세한 튜토리얼을 제공한다.
해당 튜토리얼에서는 런타임에서 사용하기 위한 인벤토리 UI를 목표로 하는데, UI ToolKit은 런타임과 에디터 UI 모두에 사용할 수 있기 때문에 크게 문제는 없다.
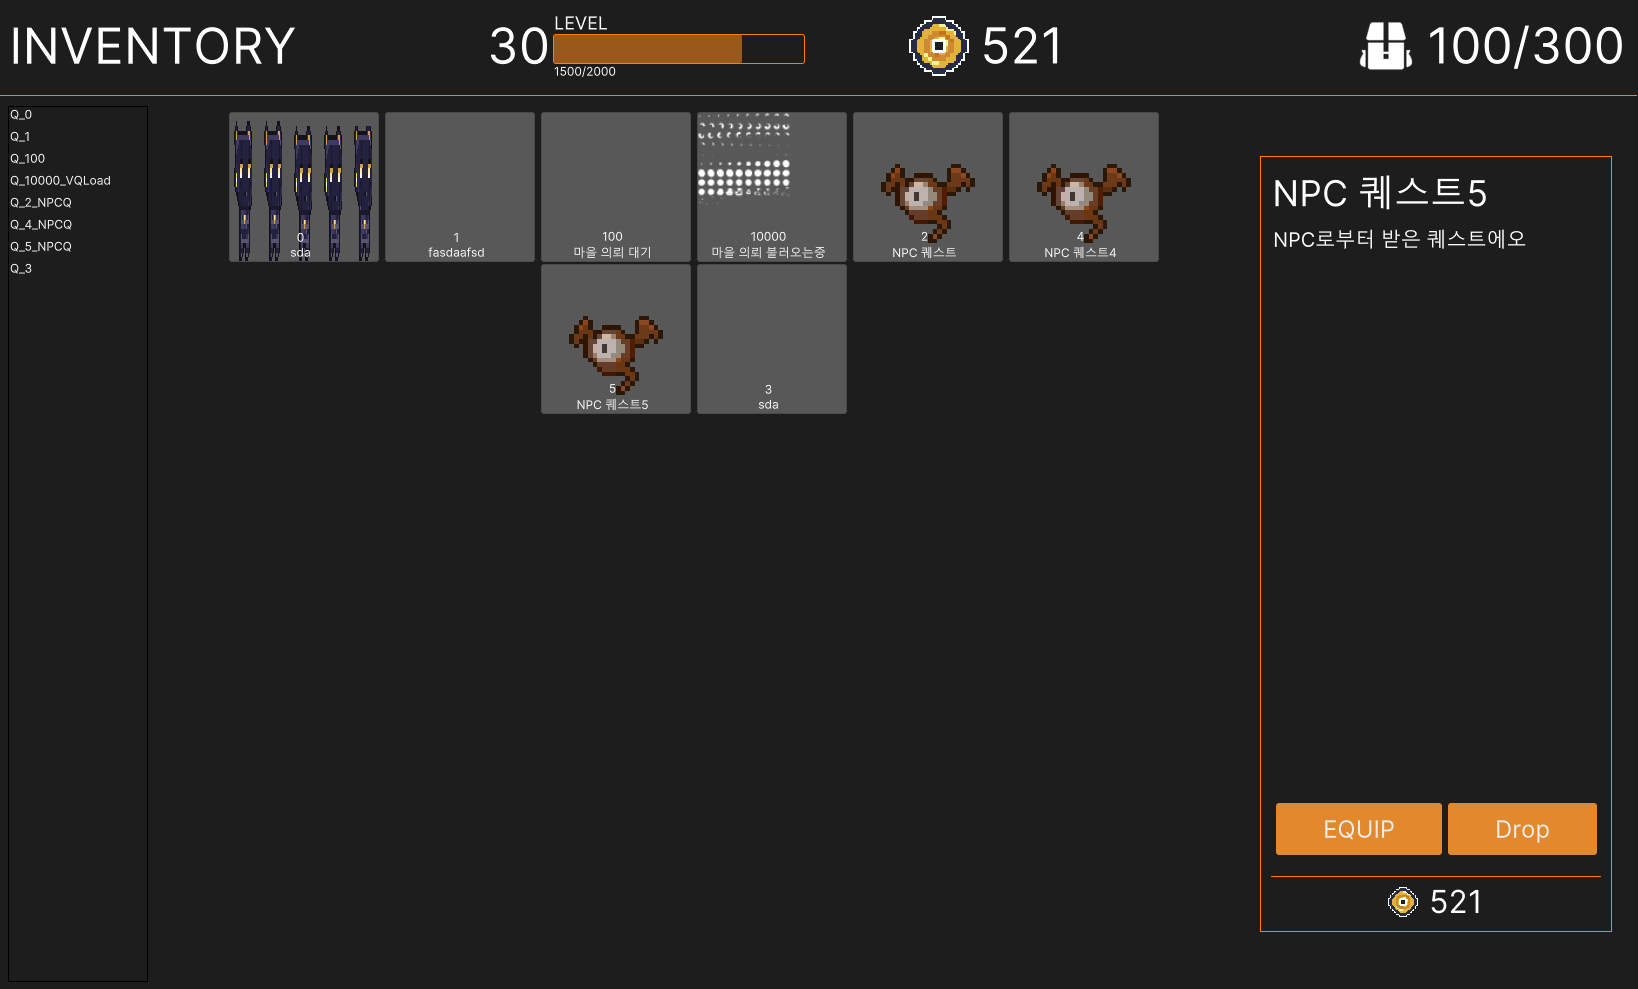
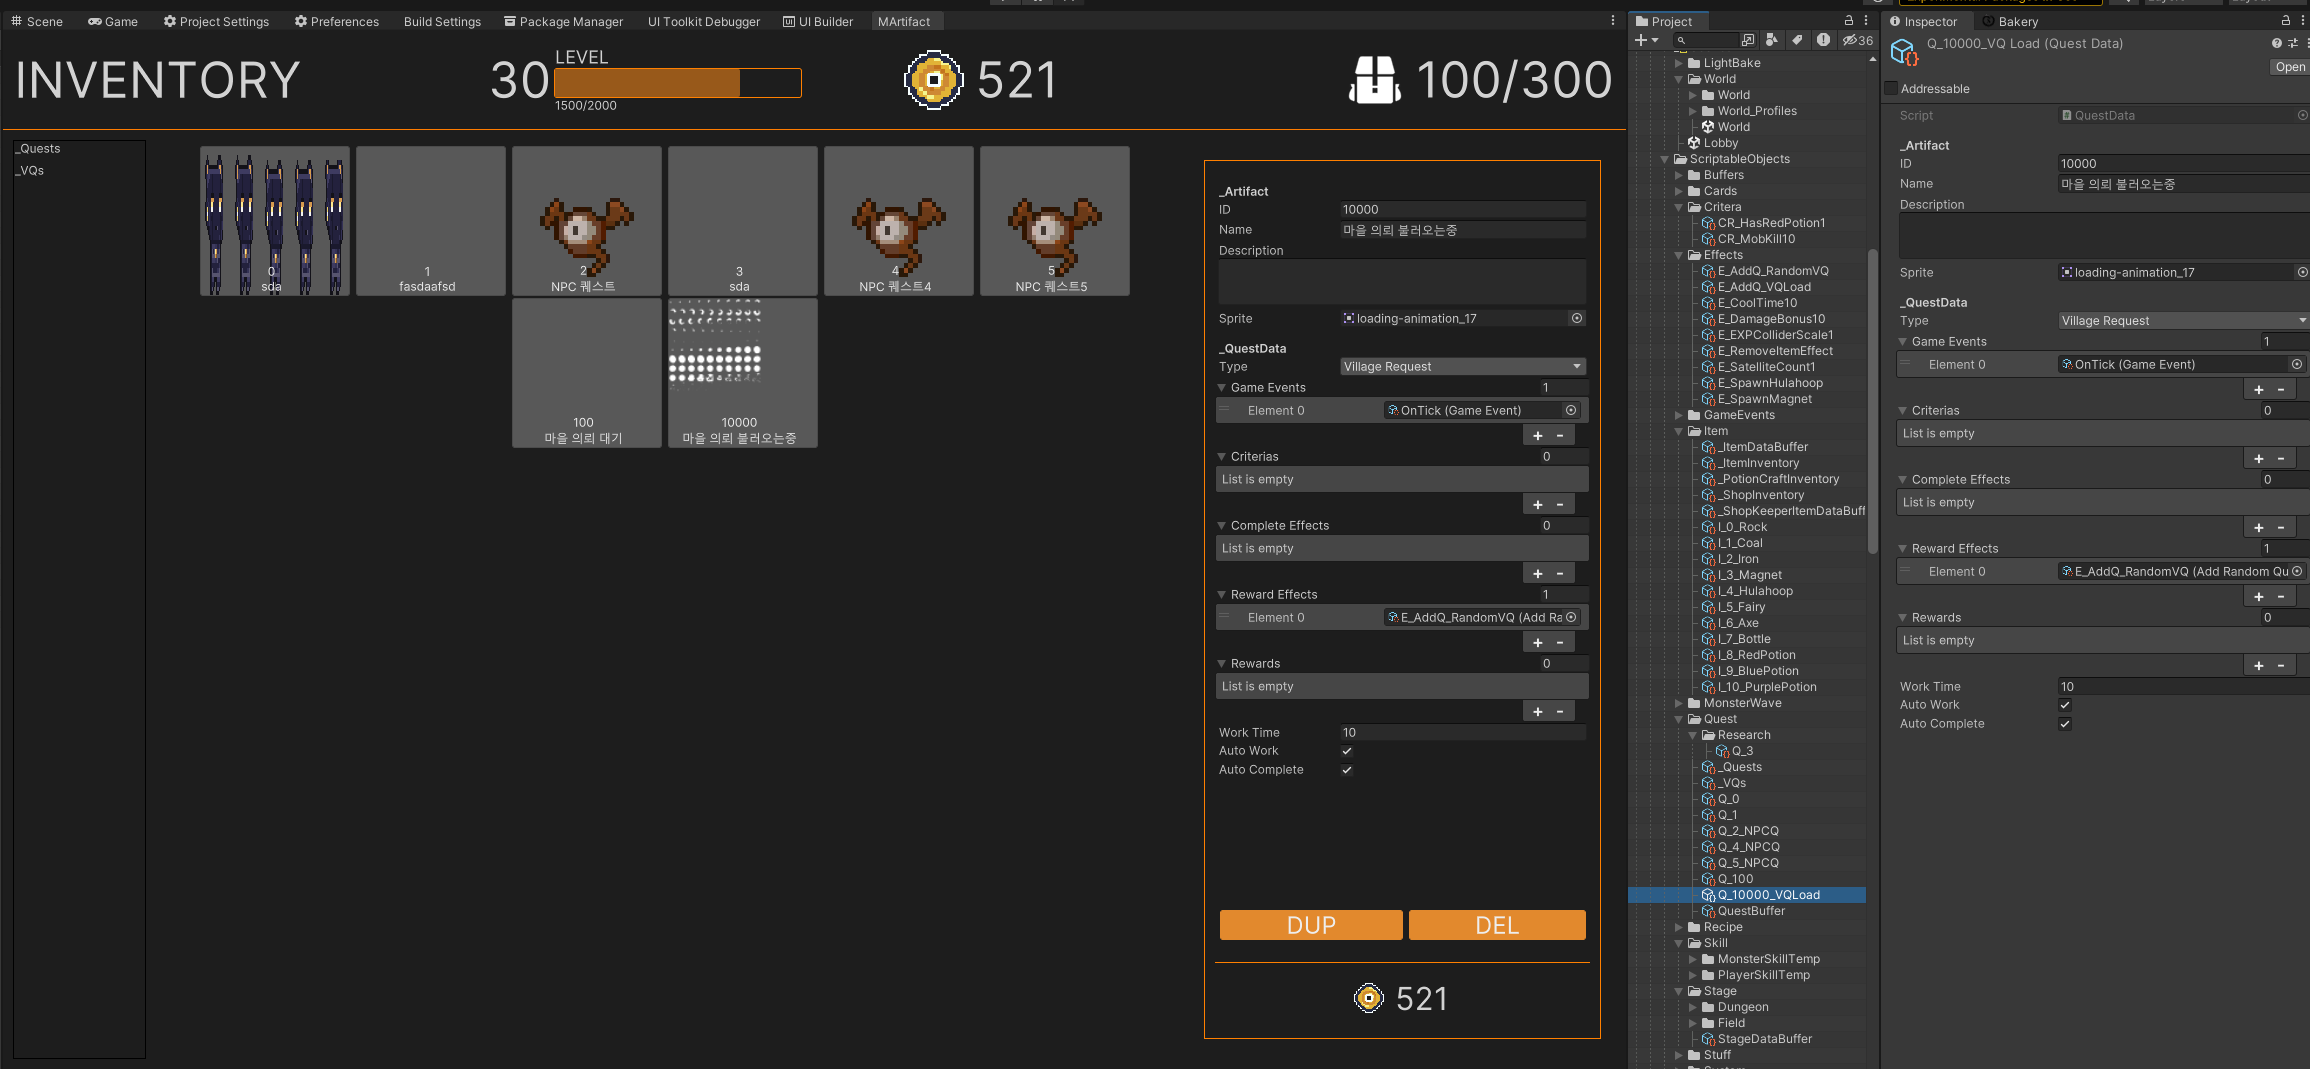
튜토리얼을 보고 따라 만든 UI에, 몇 가지 기능을 추가한 모습이다.
미리 InitAllList() 함수에서 QuestData 타입의 스크립터블 오브젝트 리스트를 저장하고,
CreateGUI() 함수에서 각 QuestData를 MArtifactVisual로 만들어 추가한다.
아래가 그 코드다.
1
2
3
4
5
6
7
8
9
10
11
12
13
14
15
16
17
18
public class MArtifactVisual: Button
{
    public Artifact Artifact { get; private set;}

    public MArtifactVisual(Artifact artifact)
    {
        this.Artifact = artifact;

        name = $"{artifact.Name}";

        Add(new Label(){ text = artifact.Name });
        Add(new Label(){ text = artifact.ID.ToString() });

        if (artifact.Sprite != null)
            style.backgroundImage = artifact.Sprite.texture;
        AddToClassList("slot-icons");
    }
}
1
2
3
4
5
6
7
8
9
10
11
12
13
14
15
16
17
18
19
20
21
22
23
24
25
26
27
28
29
30
31
private void InitAllList()
{
    const string QUEST_DIRECTORY_PATH = "Assets/_Mascari4615/ScriptableObjects/Quest/";
    questDatas = new();
    InitList(ref questDatas, QUEST_DIRECTORY_PATH);

    static void InitList<T>(ref List<T> list, string dirPath, bool searchSubDir = true) where T: ScriptableObject
    {
        const string extension = ".asset";

        DirectoryInfo dir = new(dirPath);
        foreach (FileInfo file in dir.GetFiles())
        {
            if (string.Compare(file.Extension, extension, StringComparison.Ordinal) != 0)
                continue;

            // QuestData 스크립터블 객체가 아니면 Continue
            if (AssetDatabase.GetMainAssetTypeAtPath($"{dirPath}/{file.Name}") != typeof(T))
                continue;

            list.Add(AssetDatabase.LoadAssetAtPath<T>($"{dirPath}/{file.Name}"));
        }

        if (searchSubDir)
        {
            // dir 아래 모든 폴더 안에 있는 파일을 탐색
            foreach (DirectoryInfo subDir in dir.GetDirectories())
                InitList(ref list, $"{dirPath}/{subDir.Name}/");
        }
    }
}
1
2
3
4
5
6
7
8
9
10
11
12
public void CreateGUI()
{
    // ...

    VisualElement grid = rootVisualElement.Q<VisualElement>(name: "Grid");
    foreach (QuestData questData in questDatas)
    {
        MAritifactVisual mAritifactVisual = new(questData);
        mAritifactVisual.RegisterCallback<ClickEvent>(ShowArtifact);
        grid.Add(mAritifactVisual);
    }
}
에셋 정렬
위 스크린샷을 다시 살펴보면, 에셋 순서가 엉망인걸 알 수 있다.
각 에셋 슬롯에서 이름 텍스트 위에 있는 것은 내가 임의로 설정한 ID다.
보면 ID 1 에셋 다음 ID 2 에셋이 아니라 ID 100 에셋이 오고 있고,
또 ID 3 에셋은 맨 뒤에 위치한다.
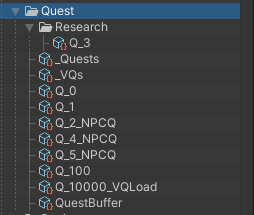
이렇게 순서가 엉망인 이유는,
파일을 불러올 때 파일 이름 문자열 순서로 불러오고, (함수 문서에 그런 언급은 없지만)
먼저 현재 디렉토리에 있는 파일들을 리스트에 추가한 뒤 하위 디렉토리를 탐색하기 때문이다.
어쨌거나, 에셋을 정렬해줘야 한다.
딕셔너리?
굳이 정렬하지 않고 Dictionary<int, Artifact> 모양으로 딕셔너리를 써도 될 것 같긴하다.
ID를 Artifact의 고유한 값으로 설정할 것이기 때문에 같은 ID를 가진 Artifact는 없다.
만약 존재한다면 잘못된 ID이기 때문에 ID를 수정해야 한다.
정렬 알고리듬을 쓴다면, 이미 존재하는 ID인지 확인하기 위해 별도의 컨테이너를 써야 하는데,
그냥 딕셔너리를 쓴다면, 단순히 ID로 Contains나 TryGetValue를 써보면 알 수 있다.
슬롯 UI 추가는,
ID가 커봤자 10만보다도 작을 거라서, for문으로 0 ~ MAX_ID까지 돌리면서 TryGetValue가 true인 것에 대해 슬롯을 추가하면 될 것 같다.
1
2
3
4
5
6
7
8
9
10
11
12
13
14
15
16
17
18
19
20
public void CreateGUI()
{
    // ...
    System.Diagnostics.Stopwatch sw = new();
    sw.Start();

    VisualElement grid = rootVisualElement.Q<VisualElement>(name: "Grid");
    for (int i = 0; i < ID_MAX; i++)
    {
        if (questDataDic.TryGetValue(i, out QuestData questData))
        {
            MArtifactVisual mAritifactVisual = new(questData);
            mAritifactVisual.RegisterCallback<ClickEvent>(ShowArtifact);
            grid.Add(mAritifactVisual);
        }
    }

    sw.Stop();
    Debug.Log($"TryGetValue x {ID_MAX} = {sw.ElapsedMilliseconds}ms");
}

음, 당장 속도는 걱정없다!
페이지 만드는 것도 단순히 이 모양에서 한 페이지에 표시할 요소 수 만큼 TryGetValue가 true면 추가하면 될 것이다.
다음 단계로 넘어간다.
에셋 관리
에셋을 관리하는 기능을 만들어보자.
에셋을 만드는 기능은 별도의 UI가 필요할 것 같아서,
당장 버튼 하나만 있으면 되는 에셋 복제와 삭제 기능부터 구현해본다.
에셋 복제
에셋 복제 기능이다.
레이아웃 우측에 위치한 툴팁의 기능을 담당하는 MArtifactDetail 클래스를 새로 만들고,
MArtifactDetail에서 버튼을 클릭 했을 때, 현재 선택된 Artifact에 대해 MArtifact의 DuplicateArtifact를 호출하도록 한다.
1
2
3
4
5
6
7
8
9
10
11
12
13
14
15
16
17
18
public class MArtifactDetail
{
    // ...

    public MArtifactDetail()
    {
        // ...
        duplicateButton = root.Q<Button>(name: "BTN_Dup");
        duplicateButton.clicked += DuplicateCurArtifact;
    }

    public void DuplicateCurArtifact()
    {
        MArtifact.Instance.DuplicateArtifact(CurArtifact);
    }

    // ...
}
이후 MArttifact 에서 실제 DuplicateArtifact 함수를 구현했다.
1
2
3
4
5
6
7
8
9
10
11
12
13
14
15
16
17
18
19
20
21
22
23
24
25
public class MArtifact: EditorWindow
{
    public void DuplicateArtifact(Artifact artifact)
    {
        string nName = artifact.Name + " Copy";
        // 중복되지 않는 ID를 찾는다.
        int nID = artifact.ID + 1;
        while (questDataDic.ContainsKey(nID))
            nID++;

        string assetName = $"Q_{nID}_{nName}";
        string path = AssetDatabase.GenerateUniqueAssetPath($"{QUEST_DIRECTORY_PATH}{assetName}.asset");

        AssetDatabase.CopyAsset(AssetDatabase.GetAssetPath(artifact), path);
        QuestData newQuestData = AssetDatabase.LoadAssetAtPath<QuestData>(path);
        newQuestData.ID = nID;
        newQuestData.Name = nName;

        questDataDic.Add(nID, newQuestData);
        VisualElement grid = rootVisualElement.Q<VisualElement>(name: "Grid");
        grid.Add(new MArtifactVisual(newQuestData));

        Repaint();
    }
}
코드를 보면 while (questDataDic.ContainsKey(nID))와 questDataDic.Add(nID, newQuestData); 에서 questDataDic을 사용하고, 또 에셋을 다시 로드할 때 QuestData 타입으로 불러오고 있다.
하지만 이 함수는 모든 Artifact 스크립터블 오브젝트에 대해서 사용할 것이기 때문에, 일반화 해야한다.
어떻게 일반화 시키면 좋을까?
일단 퀘스트를 저장해두기 위한 questDataDic이 있는 것 처럼, 다른 Artifact들도 각자 컨테이너가 있을 것이다.
전달받은 Artifact artifact를 실제 타입에 맞는 컨테이너에 추가해 데이터를 갱신해줘야 한다.
Dictionary<Type, Dictionary>를 만들어서 Dictionary들도 하나의 Dictionary로 관리해볼까?
Dictionary의 Value 타입은 고유해야 하기에 Dictionary<Type, Dictionary<int, Artifact>> 타입으로 만들고, 쓸 때는 다운캐스팅이 해서 쓰면 크게 문제가 될 것 같지 않다.
1
2
3
4
5
6
7
8
9
10
11
12
13
14
15
16
17
18
19
20
21
22
23
24
25
public void DuplicateArtifact(Artifact artifact)
{
    Type type = artifact.GetType();
    Dictionary<int, Artifact> dic = dataDics[type];

    string nName = artifact.Name + " Copy";
    // 사용되지 않은 ID를 찾는다.
    int nID = artifact.ID + 1;
    while (dic.ContainsKey(nID))
        nID++;

    string assetName = $"Q_{nID}_{nName}";
    string path = AssetDatabase.GenerateUniqueAssetPath($"{QUEST_DIRECTORY_PATH}{assetName}.asset");

    AssetDatabase.CopyAsset(AssetDatabase.GetAssetPath(artifact), path);
    Artifact newArtifact = AssetDatabase.LoadAssetAtPath<Artifact>(path);
    newArtifact.ID = nID;
    newArtifact.Name = nName;

    dic.Add(nID, newArtifact);

    VisualElement grid = rootVisualElement.Q<VisualElement>(name: "Grid");
    grid.Add(new MArtifactVisual(newArtifact));
    Repaint();
}
수정된 코드다.
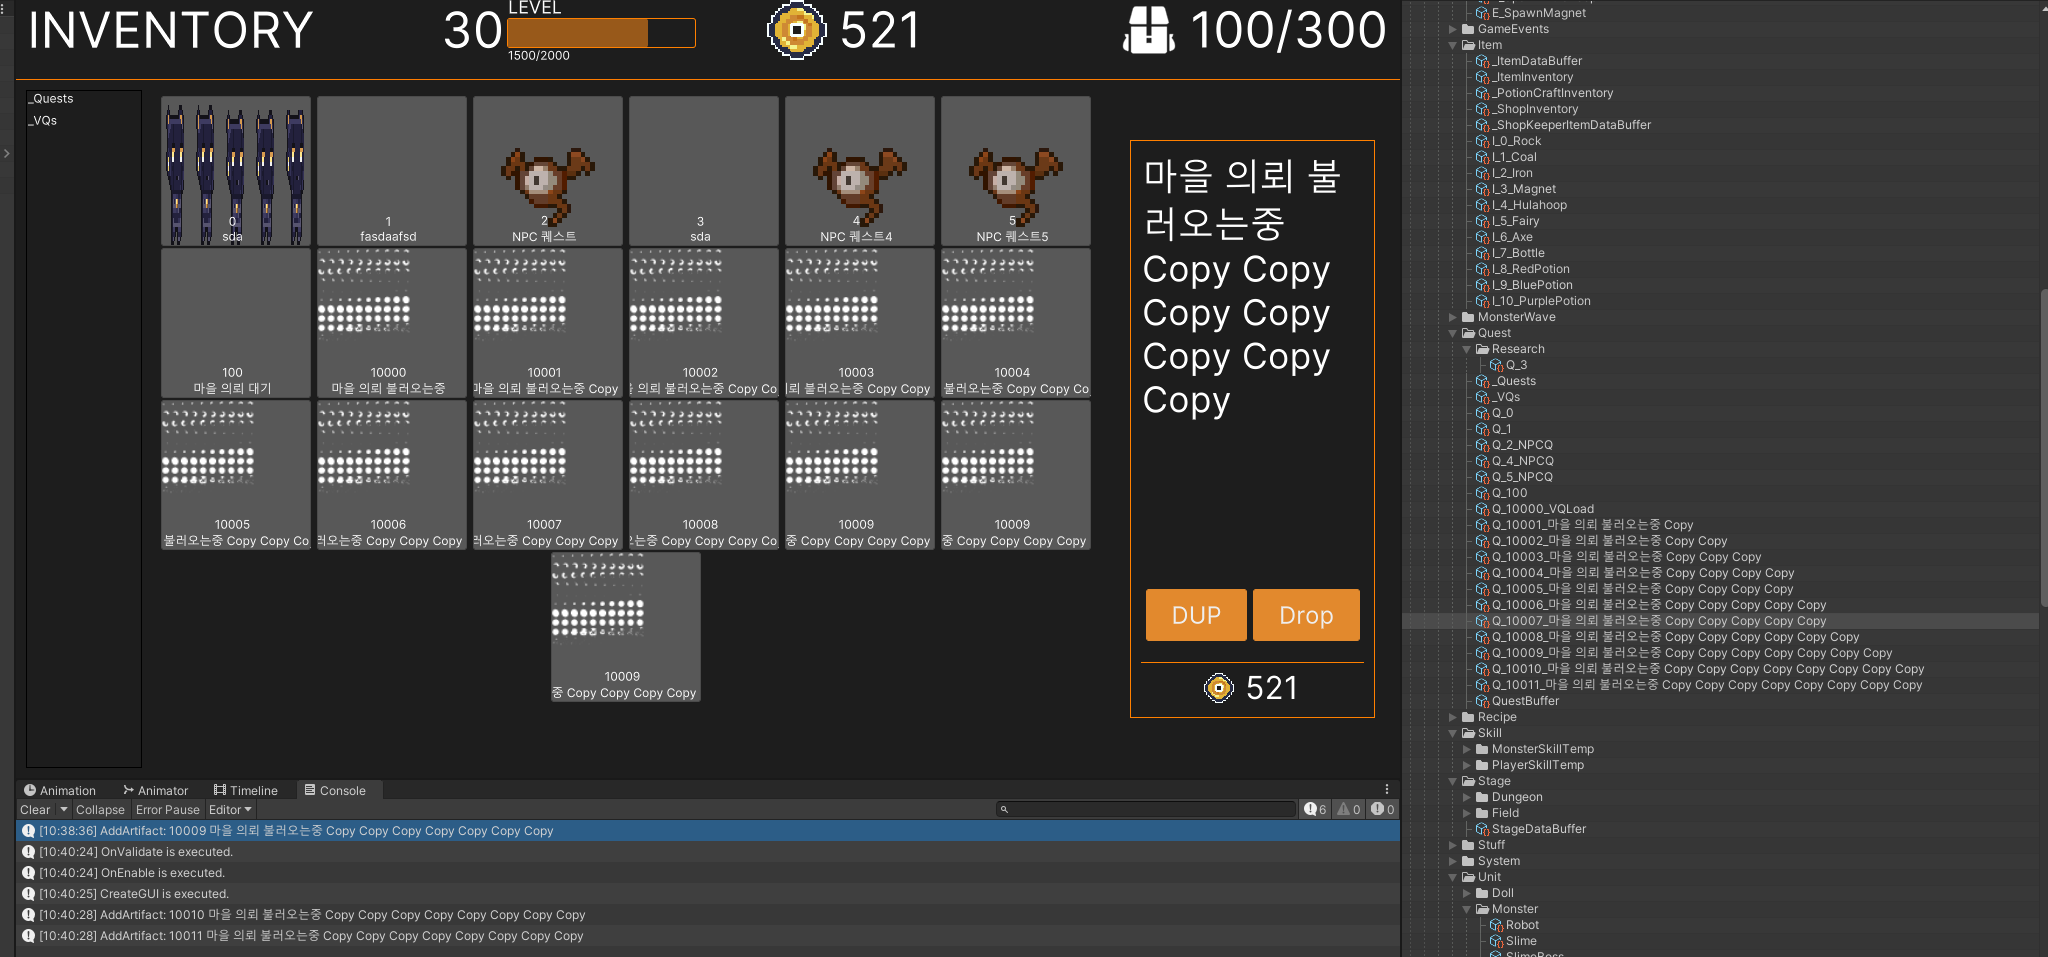
이렇게 복제 기능을 만들어봤다.
에셋 삭제
에셋 삭제 기능을 구현해본다.
복제 기능처럼 주어진 Artifact에 맞는 컨테이너를 찾아 삭제해야 한다.
.. 또 하드 코딩을 해야 하는 것인가? 고민스러운 문제다.
.. 그냥 Dictionary<Type, Dictionary<int, Artifact>>를 쓸까?
생각해보면 다운캐스팅을 필요하다고 해서 성능이나 구현에 크게 문제가 될 것 같지 않다.
그렇게 수정하고 구현해보자.
1
2
3
4
5
6
7
8
9
10
11
12
13
14
15
16
17
private readonly Dictionary<Type, Dictionary<int, Artifact>> dataDics = new();

public void DeleteArtifact(Artifact artifact)
{
    Type type = artifact.GetType();
    Dictionary<int, Artifact> dic = dataDics[type];

    string assetName = $"Q_{artifact.ID}_{artifact.Name}";
    string path = AssetDatabase.GenerateUniqueAssetPath($"{QUEST_DIRECTORY_PATH}{assetName}.asset");

    dic.Remove(artifact.ID);
    AssetDatabase.DeleteAsset(AssetDatabase.GetAssetPath(artifact));

    UpdateGrid();
}

// ...
에셋 추가
이제 에셋 추가 기능을 구현해본다.
근데.. 생각해보면 에셋 추가를 위한 별도의 UI가 없어도 될 것 같다.
기본 에셋을 추가하는 버튼 하나만 간단히 만들고,
에셋 정보를 나타내는 화면에서 드롭박스 등으로 곧바로 수정 가능하도록 하면 되지 않을까?
그러기 위해서는 에셋의 정보를 수정 가능하도록 UI를 추가해야한다.
.. 어차피 UI는 만들어야했다.
(몇 시간 뒤…)
.. PropertyField의 존재를 모르고 직접 프로퍼티 정보를 가져와서 만들고 있었다.
열심히 만들었는데 그냥 지우기 아쉬워서 남겨본다.
1
2
3
4
5
6
7
8
9
10
11
12
13
14
15
16
17
18
19
20
21
22
23
24
25
26
27
28
29
30
31
32
33
34
35
36
37
38
39
40
41
42
43
44
45
46
47
48
public PropertyBlock(Artifact artifact, PropertyInfo propertyInfo)
{
    this.artifact = artifact;
    this.propertyInfo = propertyInfo;

    PropertyName = new Label(propertyInfo.Name);
    PropertyName.AddToClassList("property-name");
    Add(PropertyName);

    SetPropertyValue();

    AddToClassList("property-block");
}

private void SetPropertyValueWithType<T, U>() where U: BaseField<T>, new()
{
    T value = (T)propertyInfo.GetValue(artifact);
    PropertyValue = new U();
    (PropertyValue as U).value = value;
}

private void SetPropertyValue()
{
    Type propertyType = propertyInfo.PropertyType;
    switch (propertyType)
    {
        case Type intType when intType == typeof(int):
            SetPropertyValueWithType<int, IntegerField>();
            break;
        case Type stringType when stringType == typeof(string):
            SetPropertyValueWithType<string, TextField>();
            bool isDescription = propertyInfo.Name == nameof(Artifact.Description);
            if (isDescription)
            {
                (PropertyValue as TextField).multiline = true;
                (PropertyValue as TextField).style.minHeight = 100;
            }

            PropertyValue.RegisterCallback<ChangeEvent<string>>(evt =>
            {
                propertyInfo.SetValue(artifact, evt.newValue);
            });
            break;
        // ...
    }
}

// ...
PropertyField를 이용한 코드는 아래와 같다.
이때, PropertyField를 초기화하는 부분에서 많이 애를 먹었다.
나는 스크립터블 오브젝트에 모든 필드를 [field: SerializeField] public int ID { get; set; } 같이 자동구현 프로퍼티로 만들었는데,
CurArtifact.GetType().GetFields()로는 필드가 검색되지 않았고,
serializedObject.FindProperty()에서도 PropertyInfo.Name으로는 필드를 찾을 수 없었다.
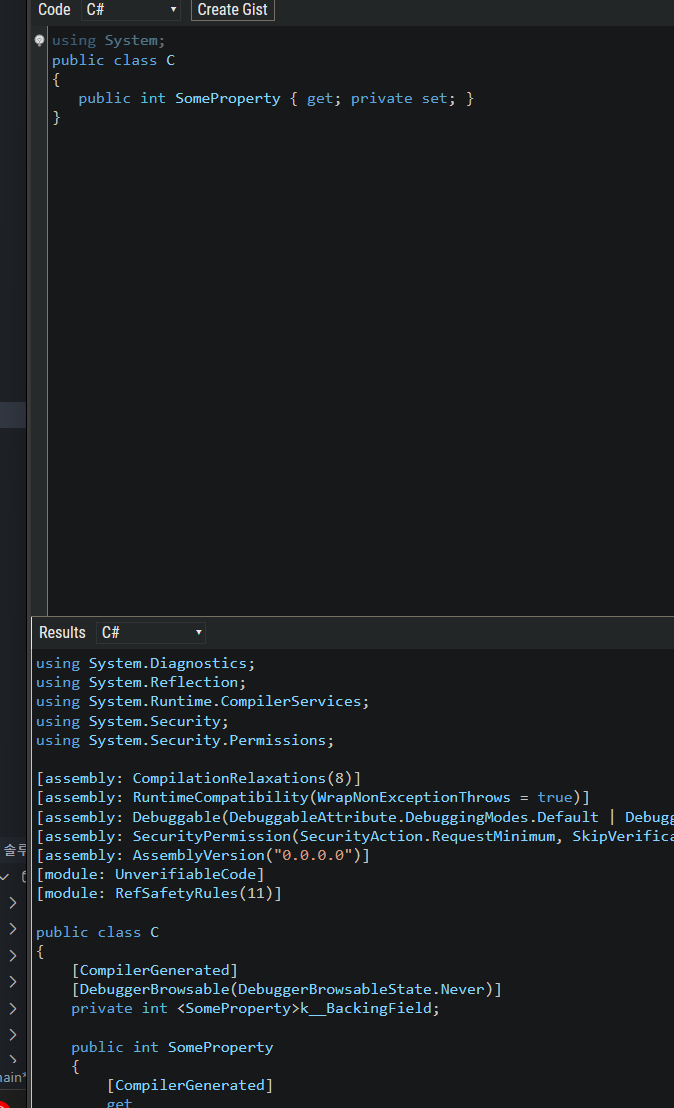
필드 이름이 도대체 뭘까 하고 sharplab.io에서 IL 코드를 확인해보고나서야, 프로퍼티의 필드 이름이 <프로퍼티이름>k__BackingField 같은 모양으로 생긴다는 것을 알았다.
이렇게 구현해도 되는 건지는 잘 모르겠지만, 어쨌든 잘 동작하기에 그대로 써보기로 한다.
1
2
3
4
5
6
7
8
9
10
11
12
13
14
15
16
17
18
19
20
21
22
23
24
25
26
27
28
29
30
public void UpdateUI()
{
    SerializedObject serializedObject = new(CurArtifact);

    // CurArtifact의 모든 프로퍼티를 리플렉션으로 가져오기
    List<PropertyInfo> propertyInfos = CurArtifact.GetType()
    .GetProperties()
    .OrderBy(
        p =>
        {
            var attribute = p.GetCustomAttribute(typeof(PropertyOrderAttribute));
            if (attribute == null)
                return int.MaxValue;
            else
                return ((PropertyOrderAttribute)attribute).Order;
        }).ToList();

    // CurArtifact의 모든 프로퍼티를 PropertyBlock으로 만들어서 artifactContent에 추가
    artifactContent.Clear();
    foreach (PropertyInfo propertyInfo in propertyInfos)
    {
        if (propertyInfo.Name == "name" || propertyInfo.Name == "hideFlags")
            continue;

        // 자동으로 생성되는 프로퍼티의 필드의 이름 = <프로퍼티이름>k__BackingField
        PropertyField propertyField = new (serializedObject.FindProperty($"<{propertyInfo.Name}>k__BackingField"));
        propertyField.Bind(serializedObject);
        artifactContent.Add(propertyField);
    }
}
잘 동작한다.
근데 이럴거면 그냥 인스펙터를 확장시키면 되는거 아니였나?
.. 일단 그냥 쓰자
이어서 간단한 에셋 추가 버튼도 만들어본다.
1
2
3
4
5
6
7
8
9
10
11
12
13
14
15
16
17
private void UpdateGrid()
{
    // ...

    Button addButton = new()
    {
        text = "+",
    };
    addButton.AddToClassList("slot-icons");
    addButton.RegisterCallback<ClickEvent>(ev =>
    {
        AddArtifact(MArtifactDetail.CurArtifact.GetType());
    });
    grid.Add(addButton);

    Repaint();
}
단순히 마지막 버튼으로 추가했다.
여러 에셋
지금은 QuestData 스크립터블 오브젝트만 불러오고 있다.
UI를 간단히 수정한 후, 다른 타입의 스크립터블 오브젝트도 불러오자.
현재 UI로 표시할 타입을 CurType으로 정의하고,
그 CurType을 원하는 타입으로 설정하는 버튼들이 모인 메뉴를 만들었다.
1
2
3
4
5
6
7
8
9
10
11
12
13
14
15
16
17
18
19
20
21
22
23
24
private Type CurType { get; set; } = typeof(QuestData);

public void CreateGUI()
{
    // ...

    VisualElement menu = rootVisualElement.Q<VisualElement>(name: "Menu");
    foreach (Type type in dataDics.Keys)
    {
        Button button = new()
        {
            text = type.Name,
        };
        button.clicked += () =>
        {
            CurType = type;
            UpdateGrid();
            MArtifactDetail.UpdateCurArtifact(dataDics[CurType].Values.First());
        };
        menu.Add(button);
    }

    // ...
}